Mushy Chocolate Covered Cookies

Image
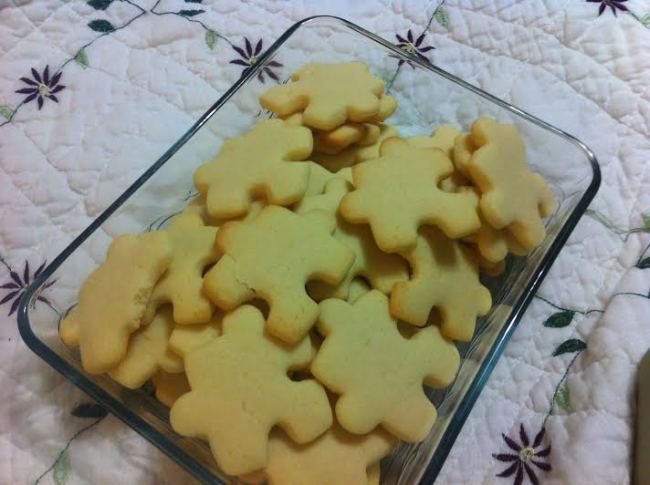
Today, Julia came over for the afternoon. I would love to pretend that I am a good sister/babysitter, but this story wouldn’t be as good. I woke up early to go to work, so I was really tired. Originally Beth was supposed to watch Julia, so I was asleep on the couch. Beth had to go, so she woke me up and left. Now, here’s the part where I’m not a good sister… I didn’t exactly wake up. So Julia went to the kitchen and made some food while I slept. 

When I woke up, there was a lovely dessert prepared in the fridge and crumbs scattering the floor.  

Needless to say I love my little sis and I was pleasantly surprised by the end result. 

Here’s her recipe:

“First if you want to make the same type as me, take Chips Ahoy, put six on the plate. Take a handful of chocolate chips and arrange them on the cookies and microwave for 50 seconds, and then again for 60 seconds. Be careful not to burn it. Spread the chocolate around on each cookie. After that you put them in fridge for a while. FInally take the smallest measuring stick and pour a bit of milk on each cookie. Then take the biggest heart shaped spoon and pour milk on the plate, each cookie absorbs some of the milk.”


I know that this recipe is creative and technically not baking, but I thought I would share because it was so sweet. It’s like extra chocolatey, pre-moistened cookies.  


Orange Chiffon Cake and Lemony Buttercream

ImageThis recipe is a bit more complicated than I usually post but it makes up for that in light and fluffy deliciousness. This cake could be for anything, a birthday, an anniversary, a new job, a good day, a bad day, seriously ANYTHING! I got this recipe and changed it from the Joy of Cooking. 


Orange Chiffon Cake:

1 cup. Rice Flour

1 cup. Potato Flour

1/4 cup. Tapioca or Potato Starch

1 1/4 cups. Sugar

1 tbsp. Baking Powder

1 tsp. Salt

5 Egg Yolks

3/4 cup. Freshly Squeezed Orange Juice

1/2 cup. Vegetable Oil

2 tbsp. Orange Zest

1 tsp. Vanilla

8 Egg Whites

1/2 tsp. Cream of Tartar

1/4 cup. Sugar


Preheat oven 325°F. Grease and line two 8-inch pans. Sift flours into a mixing bowl. Add and combine sugar, baking powder, and salt. Add egg yolks, orange juice, vegetable oil, and orange zest, beat on high speed until smooth. In another bowl beat and with clean beaters, beat egg whites and cream of tartar until stiff (I seriously mean stiff and no longer glossy). Then stir sugar into the egg whites. Add one-quarter of the egg whites to the other mixture and fold it in. Add the rest of the egg whites and fold in until smooth. Be gentle with this. Put half of the batter into each pan and bake for 35 minutes or until an inserted toothpick comes out clean. Let it cool completely before cutting each cake in half.


If I had a secret recipe this would be it. But because I am so into you guys, I will share.


Lemony Buttercream Frosting:

2 cups. Unsalted Butter (1 pound)

1/4 cup. Cream

3 cups. Icing Sugar

1 tbsp. Lemon Juice


Add butter, cream, and half the icing sugar to the mixer. Beat on high until it is nice and fluffy. Add the rest of the icing sugar and check the consistency. If it is too thick add more cream. If it is too runny add more icing sugar. Then take 1/4 cup to a different bowl. Microwave it for about 20 seconds and then add to the big bowl of icing. When I had my icing crisis, I found that this trick actually makes the buttercream, so light and smooth. Mmmm!

Then you know what you do… you frost the cake. Assemble the cake and spread icing between the layers. Then do a crumb coat. (A thin layer to seal in the crumbs.) Put it in the fridge for fifteen minutes. Add a thicker coat of icing. Press coconut onto the outside and pipe rosettes on the top.


Final step is to eat this entire cake because it’s that good! Don’t you dare share it either. Well that’s not actually what I did; but I wouldn’t judge you if that’s what you did.


I seriously want to know what you think of this recipe, so bake it and get back to me. If you think it’s too hard, it’s not. You can do it!


Enjoy!

That, my friends, is what life is all about.

Image

Frustration comes to those who dare to dream. There are set-backs, screw-ups, and failures, but what matters is perseverance.

In a previous blog post I discussed why I love baking and when I started. Now I want to explain how people tend to view my goal and what I have experienced as an aspiring baker.

For those of you who don’t know, my goal is to one day open an allergy specialized bakery. I want a bakery that connects people and creates joy in the community. My bakery will not be a faceless, tableless place solely created to capitalize.

I want a bakery with heart.

A bakery that people can come have a muffin and read Catcher in the Rye.

A bakery that welcomes children and families.

A bakery that makes the perfect wedding cake.

I want a bakery where memories are made.

Currently, I am in a communications degree at MacEwan University. I know it doesn’t exactly seem connected. But I want to do what I love and what I love is writing and baking. I decided to postpone my culinary diploma until after I finish my degree because I got a scholarship to MacEwan. I like to say that I started with my plan B. Bakeries don’t just pop up, it’s hard work and a lot of money. I decided to pursue communications to expand my skills and also so I have a way to make real money for the bakery.

Usually when I tell people that in the long run I want to be a baker, not a journalist, editor, or policy writer, they tell me not to. So many times I have had people decide that in fact baking is not in my future and it’s really their decision. That baking is too much work and not enough money. But what they don’t get is that I would never be happy as a journalist, editing makes me exhausted, and policy writing is my idea of hell. I love fiction writing and baking and that all that matters. I am going to do what I love because that, my friends, is what life is about. Find something you love and work hard to make it happen, even if it means starting with your backup plan.


Tell me about your dreams and how people perceive them.


Picture and quote found on Pinterest.

Uber Delicious post from Katie Anderson

This week is special and I have a Guest Blogger! Yay.

Readers, I would like to introduce Katie Anderson.

*Applause*

*Applause*


“It is Autism Awareness Month and so to commemorate I made cookies shaped like puzzle pieces.  The puzzle piece is the Autism pride simple, symbolizing the diverse and mysterious nature of Autism.  

Autism awareness is month is a special opportunity to educate the public about what is new in the Autism community.  For information on the events currently happening in Edmonton, check out the Autism Society of Edmonton Area.  April is also a good time to bake some lovely sugar cookies.  For a great recipe that delivers delicious cookies that are chewy with a hint of vanilla, see below.

Recipe courtesy of allrecipes.ca

Image


Ingredients:

1 1/2 cups. Butter, softened

2 cups. White sugar

4 eggs

1 tsp. Vanilla extract

5 cups. All-purpose flour

2 tsp. Baking powder

1 tsp. Salt

Directions: 

In a large bowl, cream together butter and sugar until smooth. Beat in eggs and vanilla. Stir in the flour, baking powder, and salt. Cover, and chill dough for at least one hour (or overnight).

Preheat oven to 400 degrees F (200 degrees C). Roll out dough on floured surface 1/4 to 1/2 inch thick. Cut into shapes with any cookie cutter. Place cookies 1 inch apart on ungreased cookie sheets.

Bake 6 to 8 minutes in preheated oven. Cool completely”


Thanks to Katie for an awesome post! Let us know what you think of the recipe. 


Vanilla Bean Crème Brûlée

I don’t know about you, but my favourite place in the world is Canmore, Alberta. I love the atmosphere and mood. I love the view from anywhere in town. And I love the friendly people.

At about thirteen, I was in town with my family. It was an awesome trip; we ate good food, watched movies, and went swimming and hiking. My mom and I spent one day on Main Street, shopping. Since I have five siblings, my mom often doesn’t have time to hang out one-on-one, which made that day even more special. After perusing all the stores Main Street had to offer, we went to a bistro and shared Crème Brûlée. Honestly it was delightful! I have had Crème Brûlée since, but it never compares. I finally found a recipe that is just as delicious (not as much nostalgia surrounding it though).

 Image

Recipe adapted from: Alton Brown

Image 

Ingredients:
1 litre. Heavy cream
1 Vanilla bean, split and scraped
1 cup. White sugar, divided in half
6 large egg yolks
2 litres. Hot water


Directions:
Preheat oven to 325 degrees F.

Place the cream, vanilla bean and its pulp into a medium pan and bring to a boil. Remove from the heat, cover and allow to sit for 15 minutes. Remove the vanilla bean.

In a medium bowl, whisk together HALF the sugar and the egg yolks until well blended and it lightens in color. Add the cream a little at a time, stirring continually. Pour the liquid into 6 (7 to 8-ounce) ramekins. Place the ramekins into a large cake pan or roasting pan. Pour enough hot water into the pan to come halfway up the sides of the ramekins. Bake just until the crème brûlée edges are set, but still trembling in the centre, approximately 40 to 45 minutes. Remove the ramekins from the roasting pan and refrigerate for at least two hours and up to three days.

Remove the crème brûlée from the refrigerator for at least 30 minutes prior to browning the sugar on top. Divide the remaining 1/2 cup of sugar equally among the 6 dishes and spread evenly on top. Using a torch or broiler, melt the sugar and form a crispy top.

The recipe does take a bit of time in the oven, but it’s worth it! All crème brûlée is flour-less, so gluten free, YAY! I hope you guys love this recipe as much as I do. Let me know what you think in the comments. Or tell me you’re favourite place and why.


Molten Chocolate Lava Cake  

ImageYesterday I had the urge to bake, and because I mentioned lava cakes in the last blog post, my roommate, Cameron requested it. This recipe is lactose free and can be gluten free. I made this gooey, decadent dessert in about half-an-hour. Serving each cake with a big scoop of creamy, vanilla ice cream. (Obviously it won’t be lactose free anymore.) In these posts I usually try to be humble, but honestly it was delicious, try it!


Recipe is adapted from Michael Smith


Ingredients:

8 ounces Semi-Sweet Chocolate
1/2 cup. Butter (softened)
2 tbsp. Cocoa Powder
4 Eggs
1/4 cup. White Sugar
1 tbsp. Vanilla Extract

1 tbsp. Flour (Gluten Free or Wheat)
Butter for greasing
White sugar for sprinkling on ramekins
Ice cream, for serving


Directions:

Serving: Makes 5-7 cakes

Preheat your oven to 400°F.

Melt the chocolate and butter in a heatproof bowl set over a pot of simmering water, stirring until they melt. Remove from heat and sift in the cocoa powder, stirring until smooth.

Meanwhile, beat the eggs, sugar, flour, and vanilla until they are thick and smooth. Pour in the melted chocolate and stir until smooth.

Grease each ramekin or muffin tin. Lightly sprinkle each with white sugar and shake to coat the inside, shaking out any excess. Evenly divide the cake batter among the ramekins.

Place on a rimmed baking sheet and bake until the batter rises, the tops are cracked, and the insides are still a bit gooey. Bake for approximately 10-15 minutes.

Cool for a few minutes. Run a knife around the edges of the cakes to loosen them. Carefully invert onto a plate. Serve with lots of whipped cream or ice cream.


Seriously, if you don’t try any recipes from my blog, try this one! It’s easy, allergy friendly, and delicious.

Oatmeal Chocolate Chip Cookies (Gluten, Nut, Dairy Free)  

ImageThis past week I have been feeling like I eat too much of my baking without working it off. I keep choosing TV over the gym. What on TV you ask? Survivor, naturally. I sit on my comfy couch, while I watch people work hard and starve. I decided that because I keep doing that, my baking would have to be healthier for now. Oh what a struggle. No lava cakes, crème brûlée, brownies, or tiramisu. *Sigh!*

I made these cookies in an effort to make something I wouldn’t want to eat. It didn’t work! These cookies are great. They are crisp on the outside, gooey on the inside. The sweetness of the cookie is balanced well with the bit of salt. The coconut oil makes for a nice base flavor. I had to give the cookies away so I didn’t eat them. If that isn’t a first world problem, I don’t know what is!


Recipe adapted from Summer Harms Blog


1/2 cup. Coconut oil, softened

1/2 cup. White sugar

1 Egg

1/2 tsp. Vanilla extract

3/4 cup. Brown rice flour

1/2 tsp. Baking soda

1/4 tsp. Sea salt (heaping)

1 tsp. Cinnamon

1/2 tsp. Nutmeg

1 1/2 cups. Rolled oats (gluten free)

3/4 cup. Chocolate chips (milk free)


Preheat oven to 350º. In a large bowl, cream together the coconut oil, sugar, egg, and vanilla until smooth. In a separate bowl, whisk together the flour, soda, salt, cinnamon, nutmeg, and oats. Mix dry ingredients into the wet, and stir in the chocolate chips.


Drop 1-2 inch balls of cookie dough on a parchment lined baking sheet and flatten. Bake for 10-12 minutes, and then let sit on the hot pan for a few minutes more before transferring to a cooling rack. Makes about 20 cookies.


If you want to make this vegan friendly, you could switch the egg for 1/3 cup of mashed banana.


I loved these cookies! Give them a try and let me know what you think.

5 Tips to Make Your Baking Cheaper  

Image

Once I moved out, I realized how expensive baking is. Up until then my mom supported my habit . . . thanks Mom! Flour, sugar, spices, chocolate, and butter are all costly. Sometimes I will go to the grocery store and spend fifty bucks and then look over what I bought and think, “What the flip! Why does this cost so much?” 


I put together this list of all of my tricks to keep baking cheaper:

  1. Buy all the major ingredients (flour, brown sugar, and white sugar) in bulk. Buying small packages is a waste of money. Big packages are the way to go.
  2. Try to use salted butter or margarine in certain recipes, because it’s usually one to two dollars less than unsalted butter. Don’t do this in recipes that specifically say unsalted butter or for icing recipes.
  3. Don’t buy brand name products. Why would you spend the extra money on nothing? For products like cocoa, baking soda, baking powder, eggs, and oil the name doesn’t mean anything. For chocolate though, the cheaper stuff is much worse; spend the money for the delicious, rich chocolate.
  4. Use all of your ingredients. If you have a recipe that calls for egg yolks, then use the egg whites for something else, a meringue or a healthy omelet. When your bananas get spotty, bake with them.
  5. Bulk barn! That is the final and most important money saving tip. In general bulk barn costs less, and has a good variety of baking needs. For the students and seniors out there, Wednesdays are 10% off. It’s an awesome way to save a few bucks.


I hope this helps you all save some money on your baking. Let me know some of your tricks.


Image courtesy of: http://singletrackworld.com

Fabulous Flour

flour

Today I want to talk about gluten free flour. There are many types of gluten free flour, but the most commonly used is rice flour. When you substitute one type of flour for another, it doesn’t work well. Rice flour is a common alternative, but it is the flour that has a gritty texture. I have found personally that the only way to make gluten free all-purpose flour is a combination of flours and starches. As well for many recipes adding xanthan gum is useful. What I recommend doing is making a big batch of gluten free flour and then using it just as you would regular flour.

Gluten Free All-Purpose Flour:

6 Cups. White Rice Flour

2 Cups. Potato Starch.

1 Cup. Tapioca Starch of Flour

2 Tbsp. Xanthan Gum


I hope you guys think this works as well as I do. What do you use as a alternative to wheat flour?


Image courtesy of: Sweetlyvegan

Cinnamon Apple Crisp (Gluten Free Option)

Image
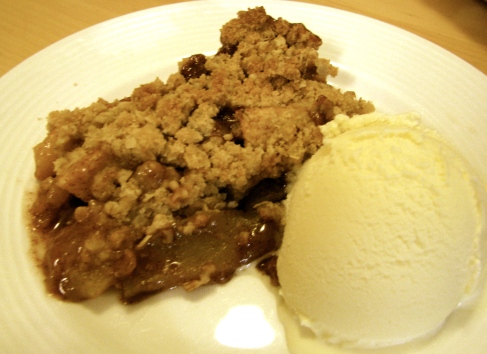
Apple anything is always a big hit in my house—apple crisp especially. When I was a kid, my Grandma would make it for us and I always loved it. My family always said that I could never make it better than hers, and anytime I used her recipe I didn’t make it better. I decided to stop trying to beat her at her own game and I came up with my own recipe.

I love this recipe! The apples have a gooey caramel-type sauce. It’s not too sweet. The crumble on top is crunchy and compliments the apples nicely. I also think this is one of the easiest apple crisp recipes, because it doesn’t involve cutting the butter in, just pouring the melted butter.

I hope you love it as much as I do!

8 Apples, peeled and sliced (I recommend Granny Smith, Gala, or Macintosh)

1 Cup. Brown Sugar

1 Tbsp. Cinnamon

1/2 Tsp. Nutmeg

1 Tbsp. Flour (Can use a gluten free substitute, like Cup4Cup)

1/4 Cup. Lemon Juice

1/4 Cup. Hot Water

1 Cup. All-Purpose Flour (Can use a gluten free substitute, like Cup4Cup)

1 Cup. Oats (Can use gluten free)

3/4 Cup. Brown Sugar

1/4 Tsp. Baking Soda

1/4 Tsp. Baking Powder

1/2 Cup. Melted Butter

Preheat oven to 375 degrees. Place peeled and sliced apples in a 9×13 baking dish. In a measuring cup add brown sugar, cinnamon, nutmeg, flour, lemon juice, and flour, and then stir. Then add hot water and mix until smooth. Pour brown sugar mixture over the apples and mix it up. In a separate bowl add flour, oats, sugar, baking soda, baking powder, and stir. Drizzle the melted butter over the mixture slowly stirring as you do so. The mixture should look like course crumbs or just small clumps of yumminess. Sprinkle the flour mixture over the apples and put it in hot oven for 35-40 minutes. Remove when topping is golden brown and apples are soft.

Eat it while it’s still warm and it is FANTASTIC (especially with ice-cream). The next day it is still great too, the flavours have had time to really combine and intensify.

What do you think of this recipe?